
It can be a lot of work creating a custom registration form or a custom service provider form. If you manage several websites, you may want to export the form to another website. Alternately, you may want to offer it as a free download to other Fabrik users. Alternately, you may want to export your forms to a DEMO website for testing purposes. In this article, we will look at the process for creating, exporting and importing a custom content type.
What is a Fabrik Content Type?
When creating a new List in Fabrik, you give the List a name and a database name. Then click Save. You will then be presented with a screen where you can choose one of the three default Content Types. If you choose one, Fabrik will automatically create not only the list, but groups, forms and elements.
Steps to Create a New Content Type
#1 Select the Form you want to use to create a content type.
Go to Components, Fabrik, Forms. We will choose the Member Registration form.
#2 Create the new Content Type
In the Content Type column, click the tiny Down Arrow.

Then click Export. Fabrik will reply, Content Type Created.
#3 Download the Content Type
Then click the Content Type tiny arrow again.

This time, click the Download button. Fabrik will download a zipped file.
#4 Use the content type on a new form in your existing website
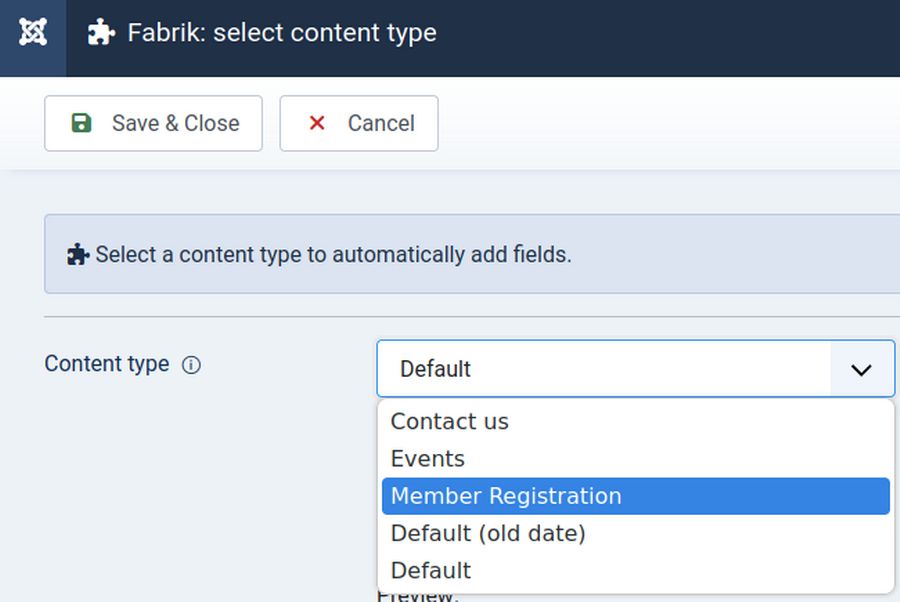
You may need different member registration forms for different groups on your existing website. If so, create a new list. Give it a Name like Test One and a unique Database name like add_test_one.
Then click Save. Change the Content Type from Default to Member Registration.
A warning may appear:
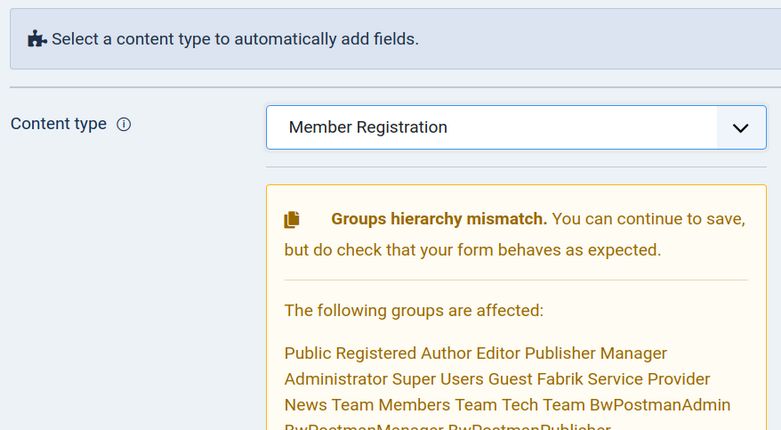
The warning is explaining that for the form to work, your website needs to have access levels matching the access levels that existed when the form was copied. Go ahead and click Save and Close. Then click View Data:
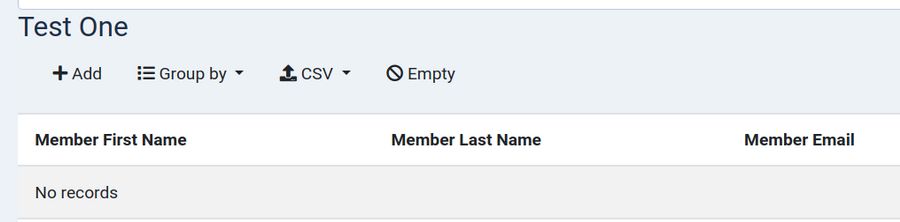
Click Add to add a new member. You will see an exact copy of your original member registration form.
#5 Migrate the Content Type to a Different Website
To use your custom Member Registration form in a different site, we need to use either the Hestia File Manager or the Phoca Commander file manager to access the root files for the new website. First install Fabrik on the new website. Then open your Hestia file manager for this website and go to
/administrator/components/com_fabrik/models/content_types
Then click Add Files to upload the .zip file that we just downloaded.
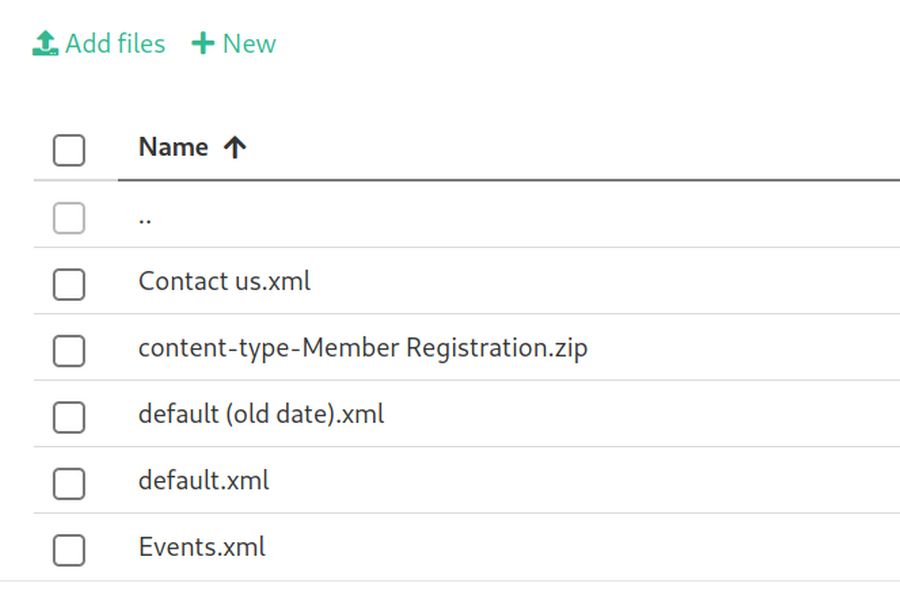
Then extract or unzip the .zip file. This will create a new XML file. Then delete the zipped file. Then exit the Hestia User Control Panel.
#6 Using the Content Type
Now that you've created a new Content Type on you new website, you can use it to create a new Fabrik List and matching form. Go to Components, Fabrik, Lists. Click the New button. Enter a Label such as Member Registration. Select the Data tab, and enter a Table name such as ace_member_registration. . Click Save. Select your Content Type Member Registration from the drop-down selection.
If there is not an exact match between the prior website groups and access levels and the new website groups and access levels, Fabrik will offer some suggestions for converting to the new website:
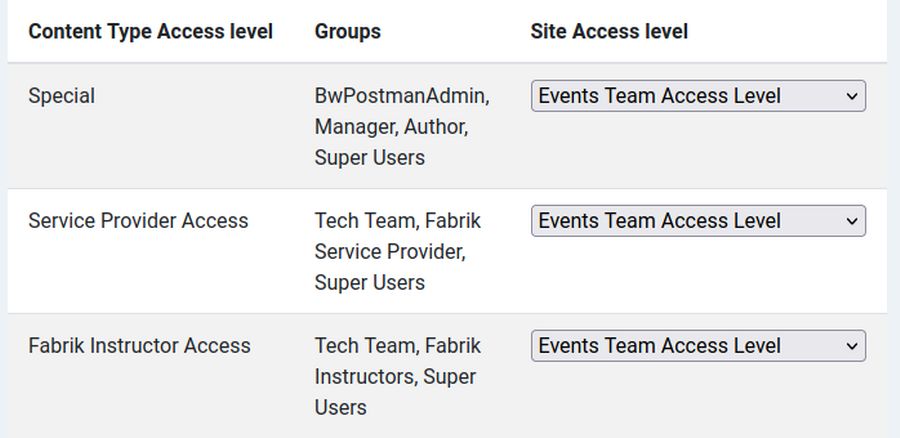
If you do not want to do this, click Cancel to cancel the list. Then create the matching groups before making your new list. Once you are happy, click Save and Close. Test the form to make sure it works. You can now customize the new form by adding or deleting elements as needed.
What’s Next?
Then next chapter, combine Fabrik with a customizable forum component called Kunena forum.