1 Create a Secure Foundation

A community network will not be sustainable over time unless it is built on a secure foundation. Sadly, the Internet is currently a hacker heaven where hackers have a variety of ways to take over your community network and demand a huge ransom payment to get it back. It is a lot of work to build a community network. We will therefore begin this course with a review of REAL website security. This chapter is divided into the following four articles.

1.1 Use a Linux Laptop to Create a Secure VPS

1.2 Use your VPS to Install Joomla

1.3 Add Joomla Extensions

1.4 Use Fabrik to Create your First Form

1.4 Create your First Fabrik Form

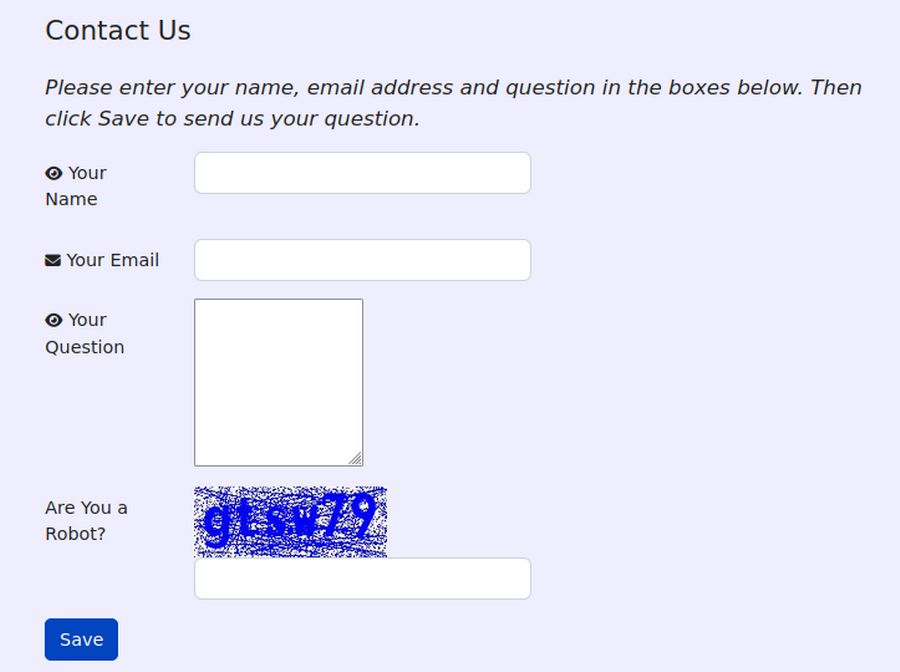
Now that we have set up a Joomla 4 website, we are ready to install and learn how to use Fabrik. Our goal is to create a Contact Us form that looks like this:

01ar

Things to do before you install Fabrik
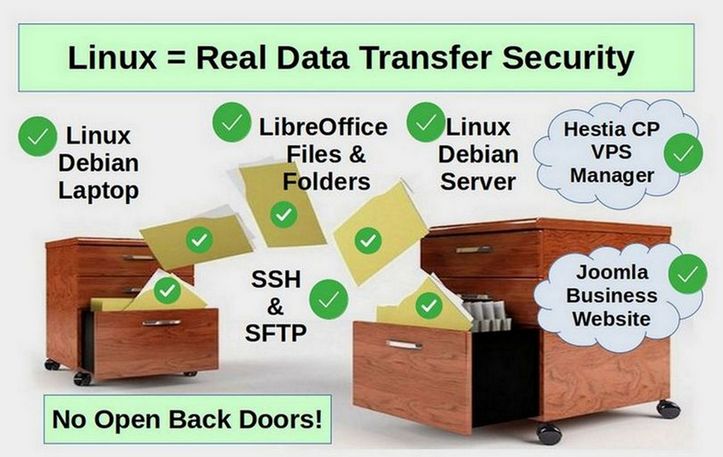
Our assumption is that you have already completed all the tasks in Chapter 1 including reflashing your computer to Linux Debian. We also assume that you have created a Linux Debian Virtual Private Server and added the Hestia Control Panel to it. We also assume that you have used the Hestia Control Panel to create a new user and installed your website domain name on your Hestia User account and create a domain-related email system for sending and receiving emails with members of your community. In addition, we assume you created a Joomla database and website and added the JCE Editor to it in order to automatically create images folders for each new member to keep their Profile Page images in. Finally, we assume you used Libre Draw to create a header for your community network website and that you installed and configured the Helix template and written a Welcome article for your Home Page. With all of this done, we are ready to install and learn how to use Fabrik. The first step is to download the Fabrik Package.

Step 1 Download and Install the Fabrik Package
The first step is to download the complete Fabrik package from this page: https://fabrikfriends.com/downloads

The package includes the component and about 70 plugins. The file size is about 70MB. Ideally, you should have either an Ethernet connection or a high speed WIFI connection to download and install it using the Joomla Installer. Then go to Extensions, Plugins and type Fabrik in the Search box. Then select and enable all of the plugins

Step 2 Create a Contact Us List (and Form)
We will create a Contact Us List (which will also create a matching form) in part because all websites need a Contact Us form and in part as practice with a simple form before we create a more complex form.  Go to Components, Fabrik, Lists and click New. For Label, type Contact Us. For Intro, leave the box blank.

 02r 
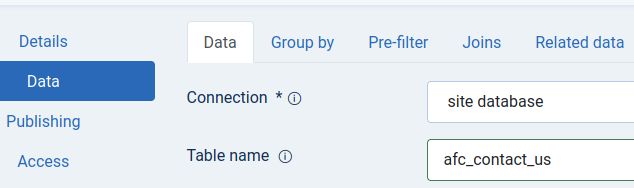
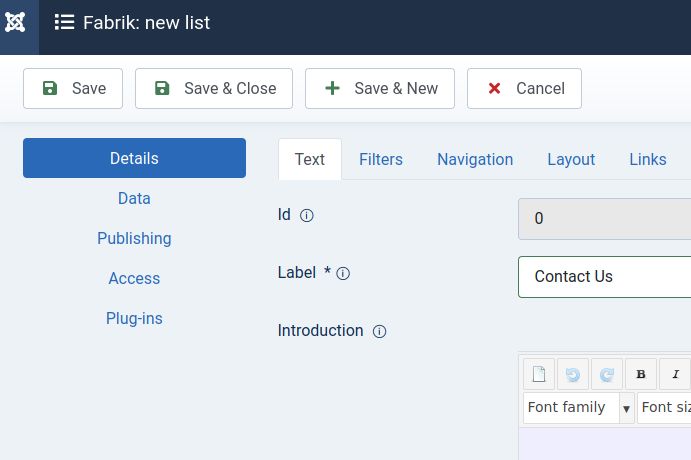
Then click on the Data tab in the left side menu. By default, the Table Name will be based on the List Name we just entered, for example, contact_us. However, this means that our Fabrik tables will be scattered all over the database. To keep all of our Fabrik tables together and to make sure that they appear at the top of the list of database tables, consider adding a 3 letter prefix to the beginning of each table. Choose something you will remember like abc or ace. Because Fabrik is an Advanced Form Component, we will add the letters afc and an underscore to the beginning of every table we create, for example, afc_contact_us. Do not try to change the name of the table later. This name change needs to occur before you save the list! 

03r

 Then click Save.

04

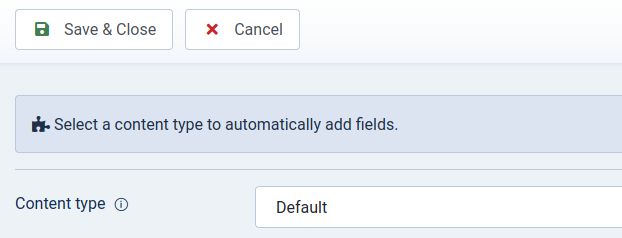
The Content type drop down arrow shows a content type called Contact Us. However, we will use the Default content type to give us more freedom to design our own contact us form. Click Save and Close.

1.3 Add Joomla Extensions

Another key ingredient in creating a secure website is adding some important Joomla security extensions. Extensions are additional tools for building Joomla websites. In this article, we will review how to add several important security extensions as well as how to install the JCE editor and the Helix Ultimate template.

01

How to Research Joomla Extensions
Let's begin by going to the home page of the Joomla Extension Directory https://extensions.joomla.org/

Joomla offers three kinds of extensions. These are called Plugins, Modules and Components. Below is a description of each type.

Plug Ins are reached and configured via the Plug In Manager. These are very small bits of code typically inserted into articles.

Modules are Joomla boxes of content. After uploading a new module, it can be found in the Module Manager.

Components are large programs which often include plugins and modules. They may add several pages of options and parameters. After uploading a new component, all components are reached from the Top Menu Components Icon.

The final type of extension is a Combination of the Components, Modules and Plugins typically called Packages. These are Components which may also come with associated Modules and/or Plug Ins. It may require more than one download to make these work. While templates are also Extensions, templates are not posted in the Extension Directory.

1.2 Use Hestia to Install Joomla

In the last article, we set up a Debian VPS and used it to install the Hestia Control Panel. In this article, we will point our domain name from Canhost to our VPS IP address. We will then create a new Hestia User and install our domain name on the new user account. We will then use Hestia to create a database and use the Hestia File Manager to create a Joomla 4 website.

01

Step 1 Use your VPS Primary IP address to point your Domain Name to your VPS server.
Here we will assume that you have already set up your Hestia VPS using a different domain name. Log into your Canhost account and click on Domains. Click on Name servers. Make sure they are set to be the default Canhost servers. Then click on My DNS. This opens the Canhost DNS Manager. By default, the Zone records point to the Canhost IP address. Delete the IP addresses in the first four records - which are all A records, and replace these IP addresses with the IP address of your own VPS.

02

Click Save. Then click Add Record to create a CAA record:

03

Your domain name goes in the top box. Type is changed to CAA. Rdata is the number 0. The next box, type issue and the bottom box, type letsencrypt.org. Then click Add Record. The second CAA record is the same only replace the word issue with issuewild. Leave the remaining DNS records in place. They are needed to connect your domain name to the Canhost servers. Then click Save Changes.

1.1 Use a Linux Laptop to Create a Secure VPS

Creating your own community network can be a lot of work. It is important that your network be securely constructed and managed to prevent it from being taken over by hackers. In this article, we will review the first step in creating a secure community network. This is reflashing at least one of your computers to Linux Debian so that you will have at least one secure computer that you can use to access your network. To be clear, it is not wise use a Windows computer to access the back end of your community network. If your Windows computer is compromised, it is only a matter of time until your website and community network will also be hacked. Here is our plan to build a secure foundation for our community network:

01

Step 1 Create a Debian Live USB
The first step is to create a Linux Debian Live USB. The first step in this process is to get two empty USB 3 drives. Use the first drive to make a copy of all of your documents on the computer you will be reflashing. Depending on how many documents, images and videos you have on your computer hard drive, this USB 3 drive may need to be 64 GB to 128 GB.

Note: Reflashing a computer will delete all documents and programs on the computer. Please copy all documents and make a list of all programs that you want to re-install after reflashing your computer.

The second USB drive will be converted into an Linux Debian 11 Live USB. It only needs to be 8 GB. I recommend Sandisk USB drives.

Download the Linux Debian 11 ISO File
Go to this page to download the 64 bit version of Linux Debian Cinnamon ISO file with non-free software (the non-free software may be needed to install WIFI and Printer drivers on your computer). The exact link changes as new versions of Debian are released. Therefore, we will start at this page:

https://cdimage.debian.org/cdimage/unofficial/non-free/cd-including-firmware/

Then click on the current-live folder. Then click the amd64 folder. Then click the iso-hybrid folder. Scroll down and click on cinnamon + nonfree.iso option. Then click on it to download it. Save this file to your home computer. It will be about 3.4 GB.

1.4 Add JCE Editor and Helix Template to your Joomla Site

Now that we have our Joomla website, in this article we will add the JCE Editor to it in order to automatically create images folders for each new member to keep their Profile Page images in. We will also use Libre Draw to create a header for our community network website. Finally, we will install and configure the Helix template and write a Welcome article for your Home Page.

Step 1 Add the JCE Editor
The JCE Editor is essential to Our Community Network as it is the only editor that will allow us to set up individual folders for each community member. Here we will show you how to configure the JCE editor so that it automatically creates a separate folder for each new member to store their images and documents in without the risk of other members accessing their personal upload folder. To download the JCE editor, go to this page:

https://www.joomlacontenteditor.net/downloads/editor/core

Then click on Download for the latest version. Then in the Joomla Control Panel, click Extensions, Manage, Install. Then click Browse for File. Then select it. It will install automatically.

Step 2 Configure the JCE Editor for use with Our Community Network
Once we install the JCE Editor, we need to modify it so that it does not allow users access to the website root folder. Also, because the JCE Editor will be used by every member of the community, it is important to set it up to allow every community member access to their own separate folder for storing their own images and other documents.

To Configure the JCE Editor, go to Components, JCE Editor. Then go to Editor Profiles, Default, Setup tab, and scroll down to User Groups. Add Registered Users to the list of permitted users. But delete Managers, Administrators and Super Users as we will soon give them a different JCE Editor. See image below.

02

Then click on the Features & Layout Tab and reduce the number of tools from four rows to two rows by moving unused icons to the lower area – but moving the font color icon to the upper area. When we are done, this is what the Editor Tool Bar will look like:

03r

Click Save. Then click on the Editor Parameters tab. We will leave URL Conversion set for relative URLs in order to make it easier to copy. But we will need to change it to Absolute URLs for the Administrator Editor for editing the Newsletter component we will be installing later. Then click on the Plugin Parameters tab. Then click on the Image Manager tab and set alignment to Center. Then click Links, and set Target to Open in a New Window. Also change Enable File Browser from Yes to No. Show Advanced Tab set to No. Show Anchor List set to No. Show Target List set to No. Set all Joomla Links List to No. Also set the Link Search to No.

Finally, click Media Support and change Allow Iframes to Yes.

Then click Save and Close. We now have the default JCE Editor set up as a normal editor.

Step 3 Create a Second JCE Editor for Administrators
Next click on JCE Editor Profiles. Select the Default Editor and click Copy. This will add another editor called Copy of Default that is exactly like the Default Editor. Click Copy of Default to open it. Change its name to Super User Editor. Change Status to Published. Scroll down to User Group, uncheck all groups except Manager, Administrator and Super Users. See image below